What is your status stars count?
Xert is unique in how it tracks low and high/peak strain and recovery loads against your calculated form.
If the dosage of low/high/peak strain isn’t sufficient to push you into tired/yellow status the next day, you’ll see HIT recommended.
You can see this graphically on the Planner by the form gradient line which will turn red/tired then back to blue/fresh before the next day.
When the recovery load is high enough form will change from red to yellow (the next day) before returning to blue.
For example, if you insert an extra-long LIT ride or higher intensity HIT workout than you’ve normally done in the recent past, that will trigger the extended recovery pattern (red to yellow to blue).
In XATA Continuous mode you are essentially in a perpetual build/peak phase under your control. You can change ramp rate to execute training blocks and Focus Duration to change what portion of the power curve you’re working on. Or you might leave it at your Moderate setting but deliberately ride outside the guidelines by using Filter to change Focus for the day, join an impromptu group ride instead, ride LIT instead of HIT, tackle a fitness test workout (in Slope mode), etc.
Xert will adapt to whatever you decide to do.
If you consistently feel the form calculation doesn’t match how you feel, consider adjusting the Recovery Demands slider. Moving it to the right (more recovery) which will cause more red/yellow to appear before a return to blue.
XMB (Garmin or EBC Android) will only show the Endurance screen format on days when no high/peak strain is recommended. To override a HIT day, you can either select a workout that has only Low XSS or go to Planner, [+], Manual tab, set High, Peak entries to 0, and Save. Then the Endurance screen will appear on XMB tied to the Low XSS target for the day.
You can also use this method to see what happens to your calculated recovery form gradient on the Planner.
For example, here’s my recommended XSS ratio today –
Difficulty Rating: ◆◆◆⬖
Availability: 1.9 hours
Recommended XSS : 129 ( 127 | 1.6 | 0.1 )
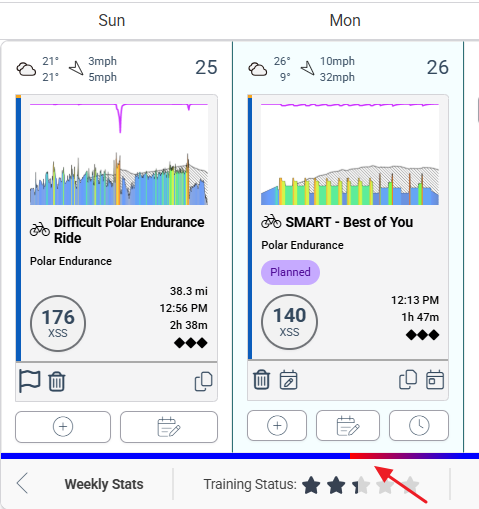
That is mostly Low strain with a smidgen of High/Peak I might easily accumulate outdoors with a few surges. If I select one of the recommended workouts the result is this –
I’m back to blue/fresh a few hours later.
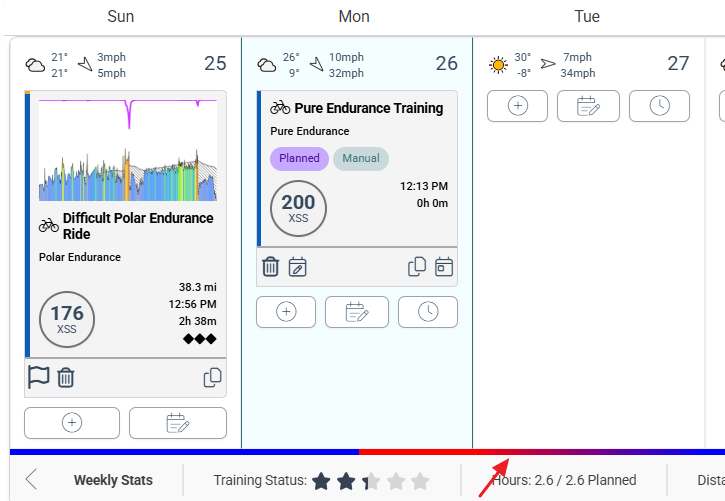
If I go to Planner and instead add a manual entry for long endurance (200 | 0 | 0) I get this –
I’m back to blue by the middle of the next day. If I rode early that next day (while still in red) the recommendation would be Active Recovery.
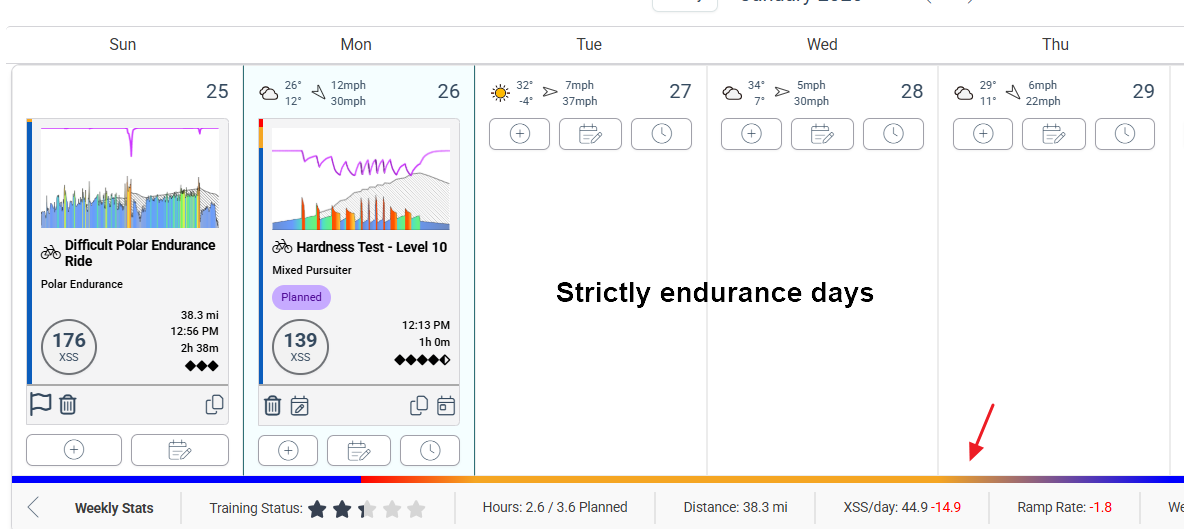
Now watch what happens if I jack up the intensity beyond my current status and difficulty range and select a Mixed Pursuiter workout. E.g. a 4-1/2 diamond hour of hell I’ll likely fail.

If I somehow pulled off that workout HIT won’t be recommended until midday three days later.
More likely I would have bailed at some point but accumulated enough high/peak to keep me in yellow through the following day.
Red/v tired = recovery/rest
Yellow/tired = endurance
Blue/fresh = HIT in and around your selected Focus Duration
Green/v. fresh = ready to tackle anything
Brown = detraining
The other contributing factor is Specificity. Where did you spend the most time.
- Pure – You spent a majority of your time at or near the Focus intensity.
- Polar – You spent a majority of your time at Endurance intensity with efforts above your Focus intensity.
- Mixed – You had a mix of Endurance, Focus intensity and efforts above and below it.
Polar HIT is less strain than Mixed or Pure.
The combination of recommended XSS (low/high/peak distribution which equates to Focus Duration target), Difficulty (diamond count; highest XSS per hour), and Specificity determine the calculated recovery load. I.e. number of days/hours required to return low and high/peak systems to fresh form.
Reference – Training Load & Status – Xert